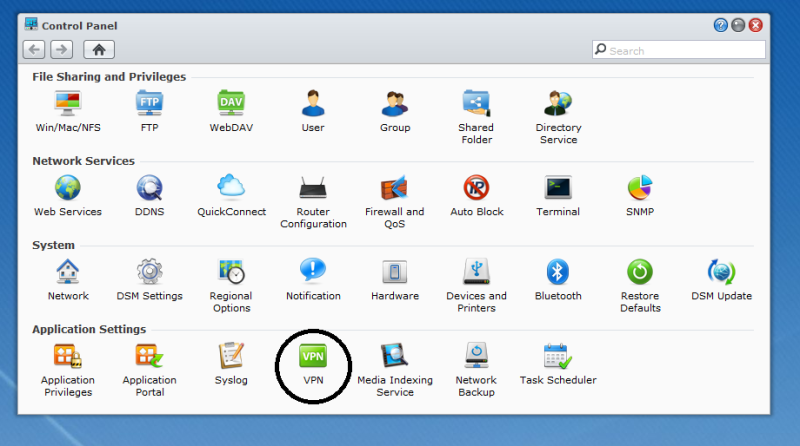
Steg 1
Click on the menu and then Control Panel
Steg 2
Click on VPN.
Steg 3
Click on Create.
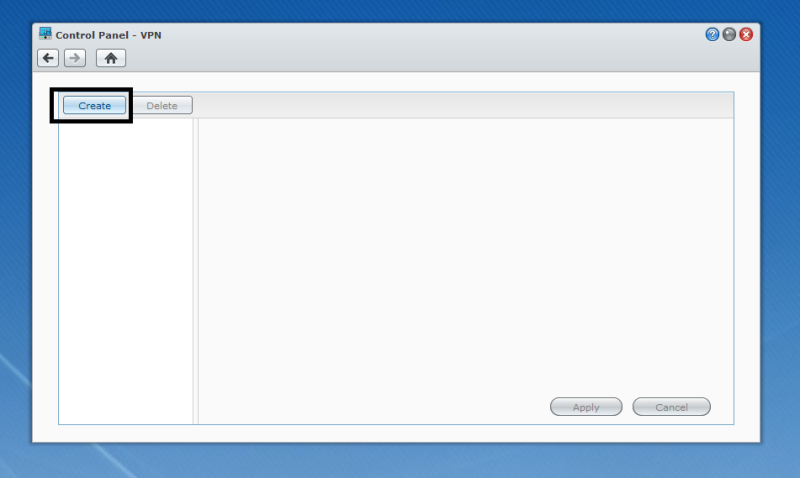
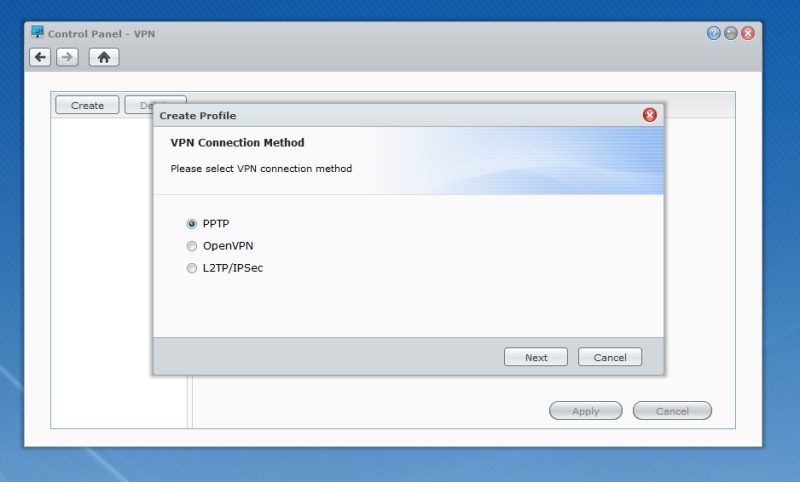
Steg 4
Select PPTP and then click Next.
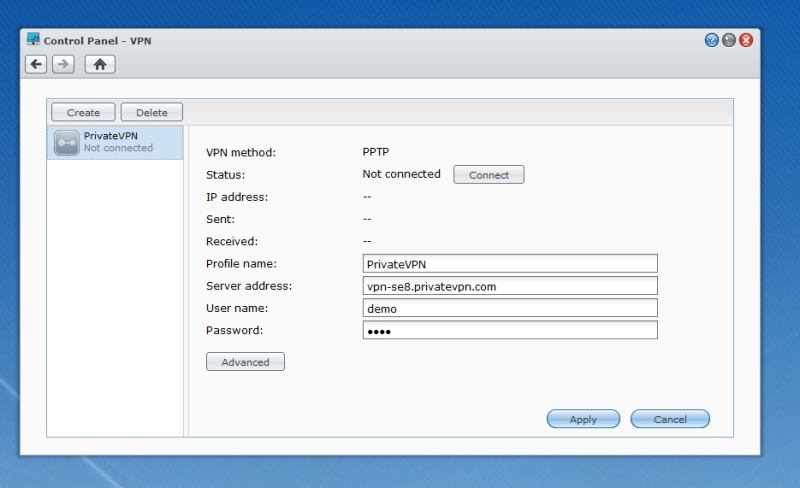
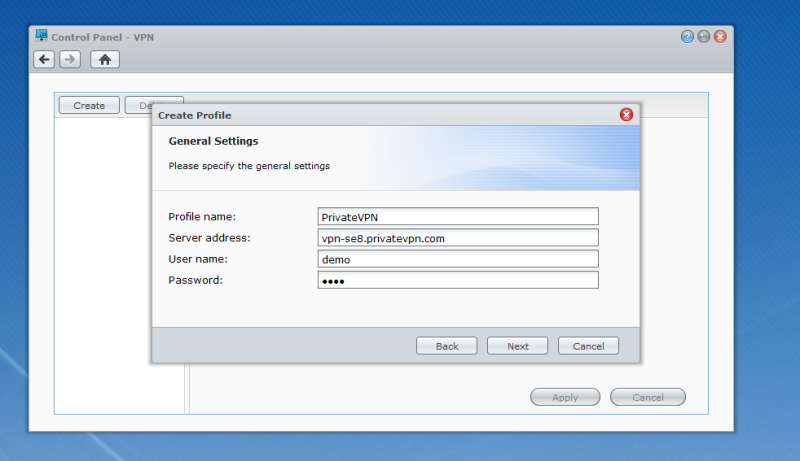
Steg 5
Profile name: PrivateVPN
Server address: See server list below
User name: PrivateVPN user
Password: PrivateVPN password
Now click Next
You’ll find the server list here: Server list
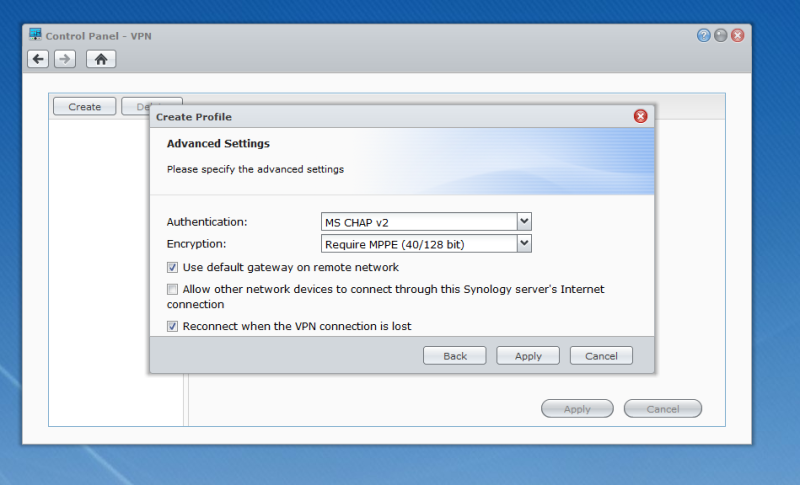
Steg 6
Check “Use default gateway on remote network” and “Reconnect when the VPN connection is lost”.
Click on Apply.
Steg 7
Click on “Connect”.