
Introduction:
YunoHost is server operating system based on Linux Debian distribution. Main goal of it is to provide self-hosting to as many people as possible, while retaining quality and reliability. Difference from other hosting solutions, YunoHost is not meant to be used in multi-user environments.
You can host your friends, family and company data safely and with ease, but you must trust your users, and they must trust you above all. If you do want to provide YunoHost services for unknown persons anyway, best would be to provide full VPS per user.
YunoHost installation:
Once you have installed Debian 9 on our Linux VPS, login to the server through ssh and install YunoHost with:
curl https://install.yunohost.org | bash1. Login to YunoHost.
Access to YunoHost can be successfully established by using your VPS hostname as URL in any browser:
https://your-hostname.tld/yunohost/admin/#/
Login password is the same as of your VPS root user, that can be found in your VPS management page, under “Login Details” tab.

2. Adding New User.
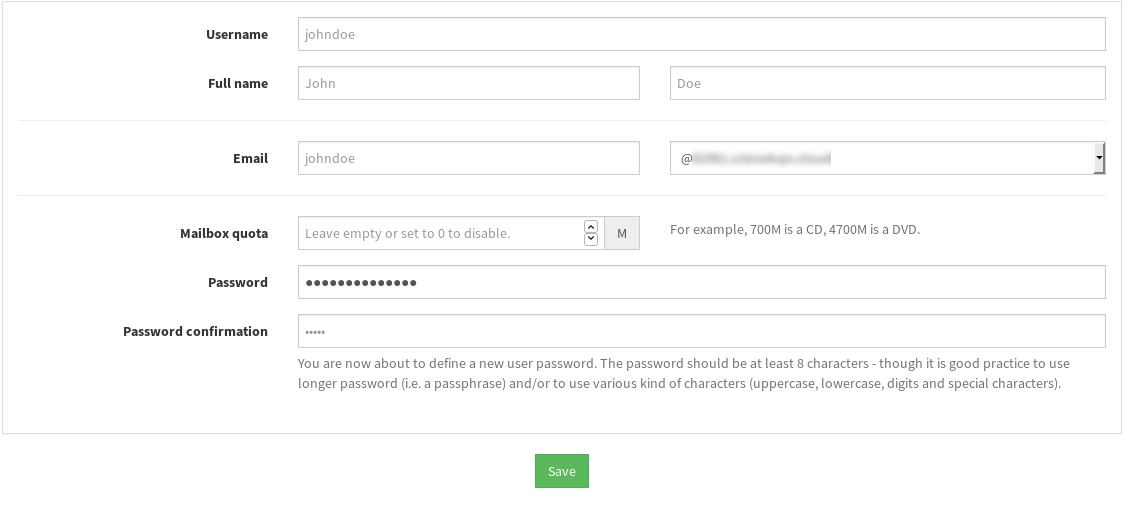
To add new user, select “Users” tab in the seen list and press green “+New user” button.

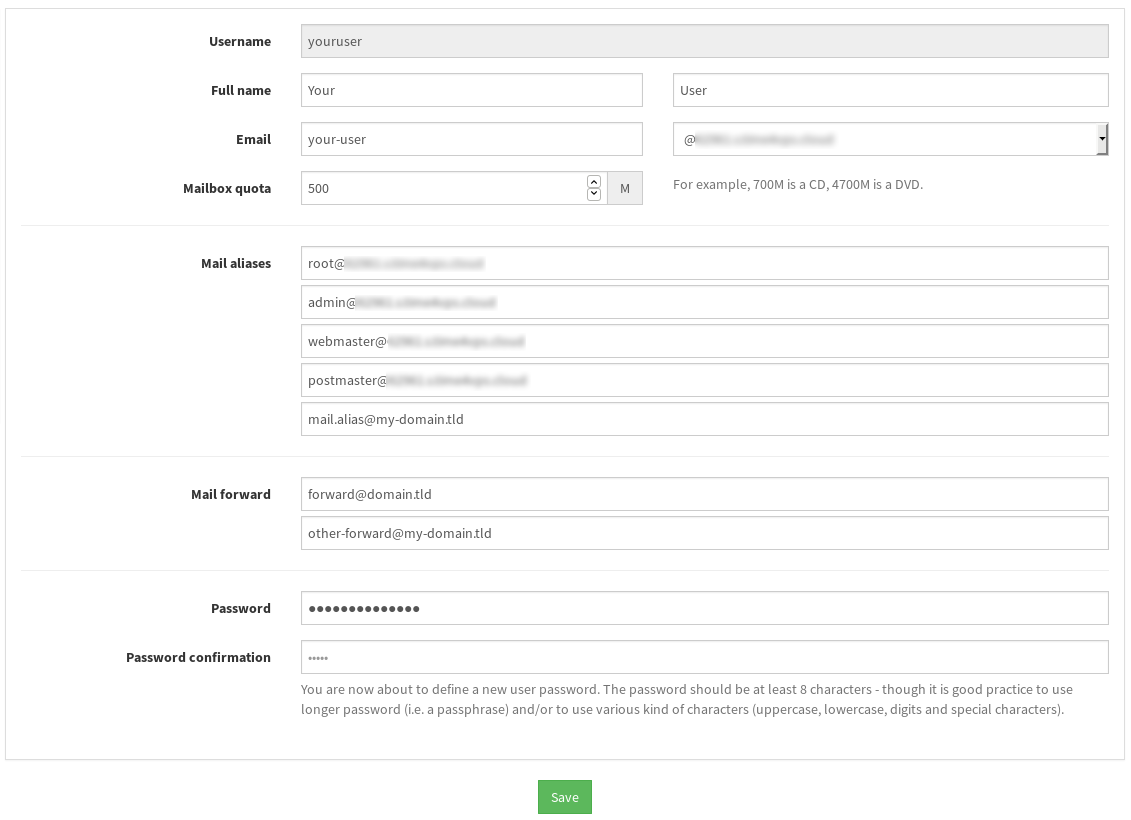
Then you will have to fill in the requested fields for user information. Take notice that username must be of all lowercase letters. If you will have no additional domains added, the user will have it’s e-mail created under the hostname of the VPS (it can be changed afterward). The created user will also have it’s “root”, “admin”, “webmaster” and “postmaster” e-mail addresses created under the chosen domain as aliases.
Access to the created user panel can be done by using “User Interface” button at the top right corner of YunoHost panel, where you will be able to log-in with username and password you have created.
3. Creating additional Mail aliases.
Additional mail aliases can be created in the user edit page (Users>youruser>Edit youruser’s account). Here you will be able to adjust current user’s details, change its password, create additional mail aliases and mail forwarders. After the changes are made, do not forget to save them.
For usage of the created e-mail addresses, you can configure your used mail client software. However if you wish to access the e-mails via browser, you can install RoundCube or Rainloop applications. The installation of applications will be described in step “5. Installing needed applications”.
4. Adding domains to your panel.
To add multiple domains, get back to the home screen and select tab “Domains“.
The creation is very similar to user creation where you have to press green “+Add domain” button.
Then you will have the option to add your own domain, or use a free domain, that will be used as sub-domain of “nohost.me”, “noho.st” or “ynh.fr” domains that are provided and managed by YunoHost.

If you will choose “I don’t have a domain name”, you will be able to create sub-domain on one of free YunoHost domains. The DNS zone records in such case would be created automatically.
If you will add your own domain, you should create DNS zone records for it. To know what records you should use, open the “DNS configuration” option, that will provide you with list of records needed.

YunoHost template also has Let’s Encrypt included that can generate a free SSL certificate for your domain. For the certificate to be an issue, choose the second highlighted option in the screenshot above – “SSL certificate“. By default, the domains will be using self-signed certificate, however, you could generate a new one by choosing “Install a Let’s Encrypt certificate” option. The only requirement for this is that the domain would be pointed to the VPS IP.

5. Installing needed applications
Once you will have the user accounts and domains prepared for usage, you can proceed with the installation of needed applications. For this, head back to the Home screen and choose tab “Applications“.

Same method again, when you should choose green “Install” button in the top right corner.

On the main page of Applications, you will see a list of applications that are approved and provided by YunoHost. To install any of them, choose “Install” option at the bottom right corner of wanted application. To find your wanted application, the search field is on top of the table for your convenience.
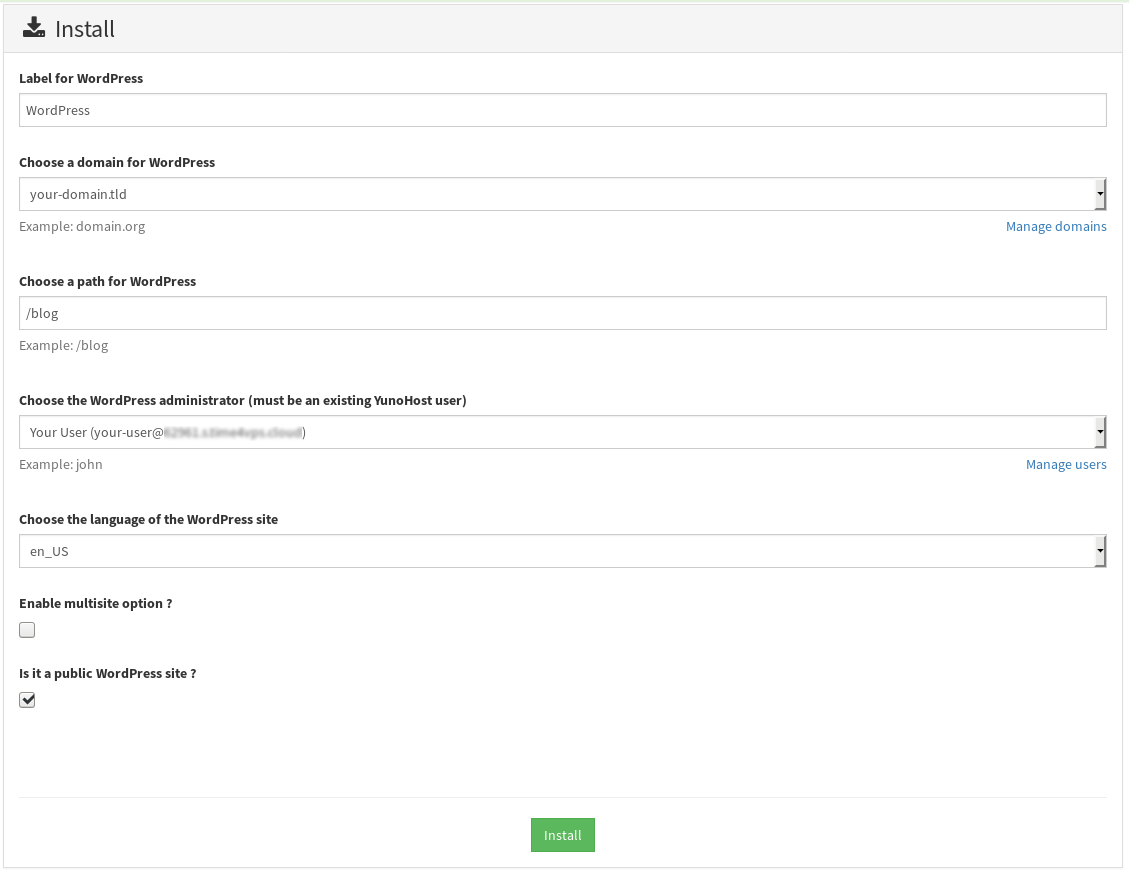
After choosing one or another Application, you will have to provide required information that are related to the specific choice. For example for WordPress installation, you will have to fill in the following information with your label for WordPress, chosen domain, path and etc. To finish up, press “Install” at the bottom of the table.
After installation will be completed, the application will appear in the “Application” section list:

6. Remaining sections of the Panel.
The first 5 steps that were described are the main ones needed for setting up your YunoHost panel for usage. Now we will check the remaining 4 parts of the home menu briefly:

6.1 System update.
This section will be relevant after some time from when you will start using the panel. Here you will be able to check for updates on any system or installed applications.
6.2 Services.
Provides you with table of services that are installed and used in your panel. After choosing one or another service, you will be able to “Disable” (“Enable), “Stop” (“Start”) the service or check log related to the service. This section is very helpful if you have unknown issues with your VPS and need to start investigation. On the main “Services” page you can check the statuses of each services and if needed, proceed with Log investigation.
6.3 Tools.
Widest section of the whole menu. Provides multiple tools for server management from Diagnosis on the VPS or it’s Firewall configuration, to administrator password change and Shutdown/Reboot of the whole VPS.
6.4 Backup.
Last section of the panel where you can backup your VPS information if you plan on making any changes. After choosing “Local archives” sub-category, as usual – green button on the right that says “New backup” should be your main interest. By pressing it you will be able to select what parts of your VPS you would like to include in the backup. For its generation press another green button on the bottom that says “Backup”.
After backup generation will be completed, the copy will be added in the “Local archives” category. By opening the backup copy, you will see when it was generated, what is included in the backup, and the option to restore it (Green “Restore” button). You can either restore a partial backup on your chosen sections or restore all of the available sections. After confirming the restoration, you will receive a notification, when the process will be completed.
For any in-depth information on the YunoHost panel and project, you can check the official documentation here https://yunohost.org/#/docs