
SpamExpets SPAM filter keeps all received email logs. By checking these logs we can see what actions were taken with them. For example, see if the email reaches the filter, why the email was stopped or rejected.
Important: received email log appears in this list within 10 minutes of the email being checked, so you may not see it immediately after receiving the email.
1. Log in to the SpamExperts SPAM filter management via the client’s area:
How to connect to SpamExperts SPAM filter control panel?
2. Open the section Logs:
After logging in to the filter control panel press on “Logs“ in section “Incoming”: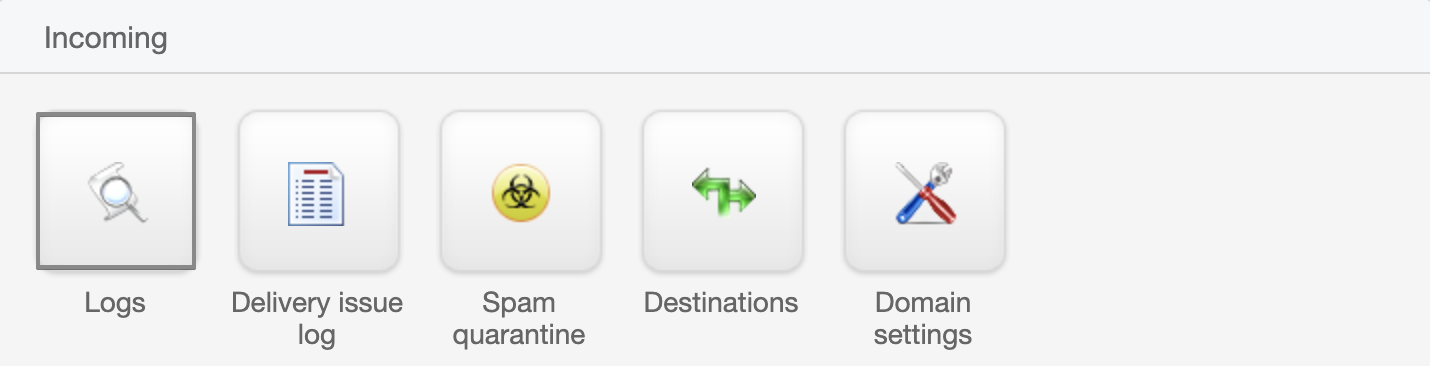
Here you will see section “Log Search” and default searching setting by “Timestamp”:
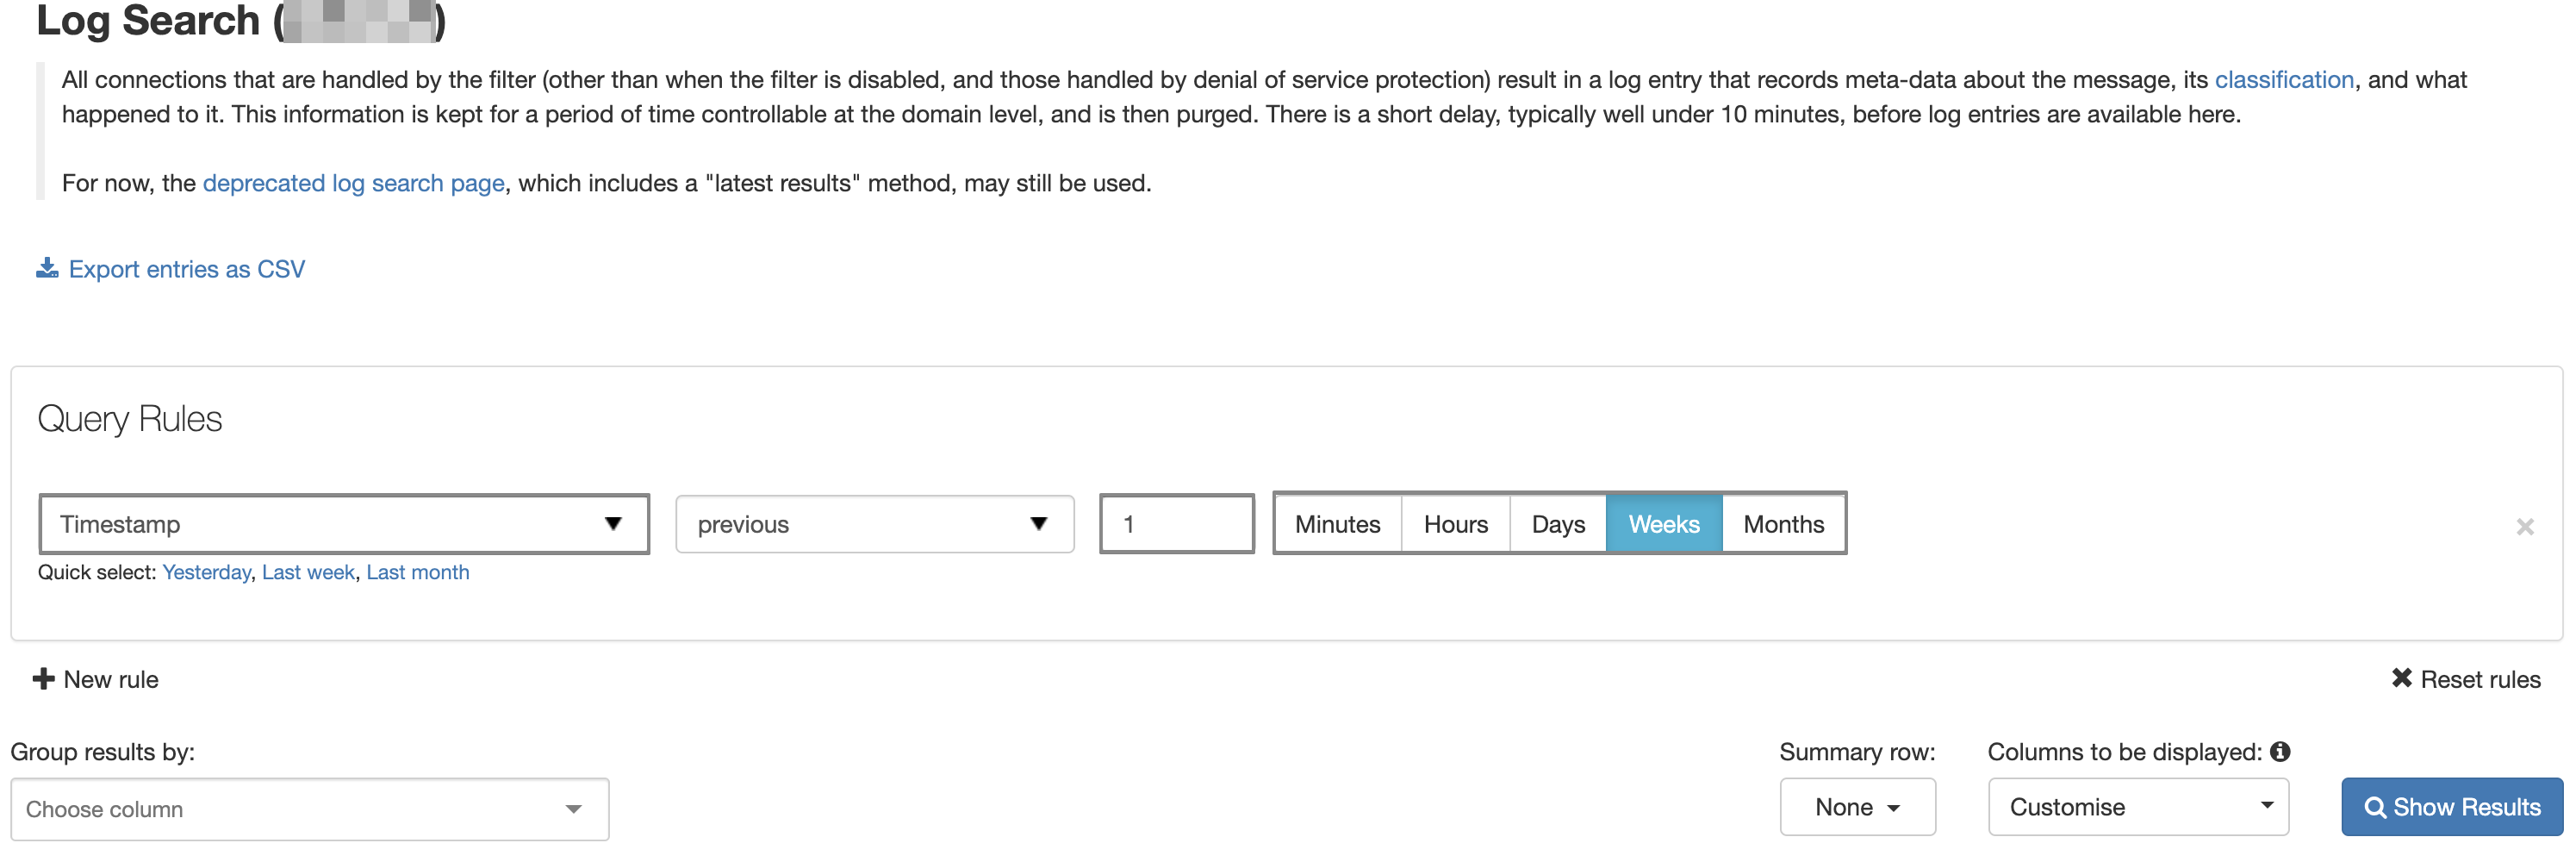
Searching for an email by a specific time, you can select a unit of time and a number, e.g. selecting 1 and “Weeks”. In this case, one-week logs will be checked.
Instead of “Timestamp” other searching parameters can be used:
- In the first window, you can choose a parameter according to the filter will search necessary email/emails, e.g.:
Sender – search by the email sender;
Recipient – search by the email recipient;
Subject – search by email subject;
Sender Hostname – search by the sender’s mail server;
Timestamp – search by time;
CC – search by email recipient that has been added as an additional recipient.
There are some more specific searching parameters which can be used as well:
- The second window option depends on the first window searching parameter. For example, if you choose “Subject” then in the second window you can choose “contains” so that the filter finds all emails with this necessary subject.
- In the third window, you enter a specific parameter based on the setting you selected. For example, if you selected “Sender”, enter the necessary email of the sender which should be found.
3. Actions with logs:
The layout of the received logs table can be managed according to the selected option in the section “Group results by”. You can also add additional columns or remove inactive ones in the section “Columns to be displayed”. After making changes to these fields, you have to click the “Search” button for the changes to take effect:
 You can also perform actions with the emails themself. To perform actions for one or more emails you need to select the necessary email/emails on the left side. At the bottom of the list, you will see the section “Apply to selected”. After selecting the desired action, select the “Apply” button:

The most relevant actions that can be performed with quarantined emails:
- Remove from quarantine – remove email from quarantine (the email will not be delivered to the recipient);
- Release from quarantine – deliver the email to the recipient;
- Release and train from quarantine – deliver the email to the recipient and indicate to the filter that this type of emails should not be quarantined in the future.
4. Logs downloading:
All needed logs can be sent to your email. For that press on “Email this Search”: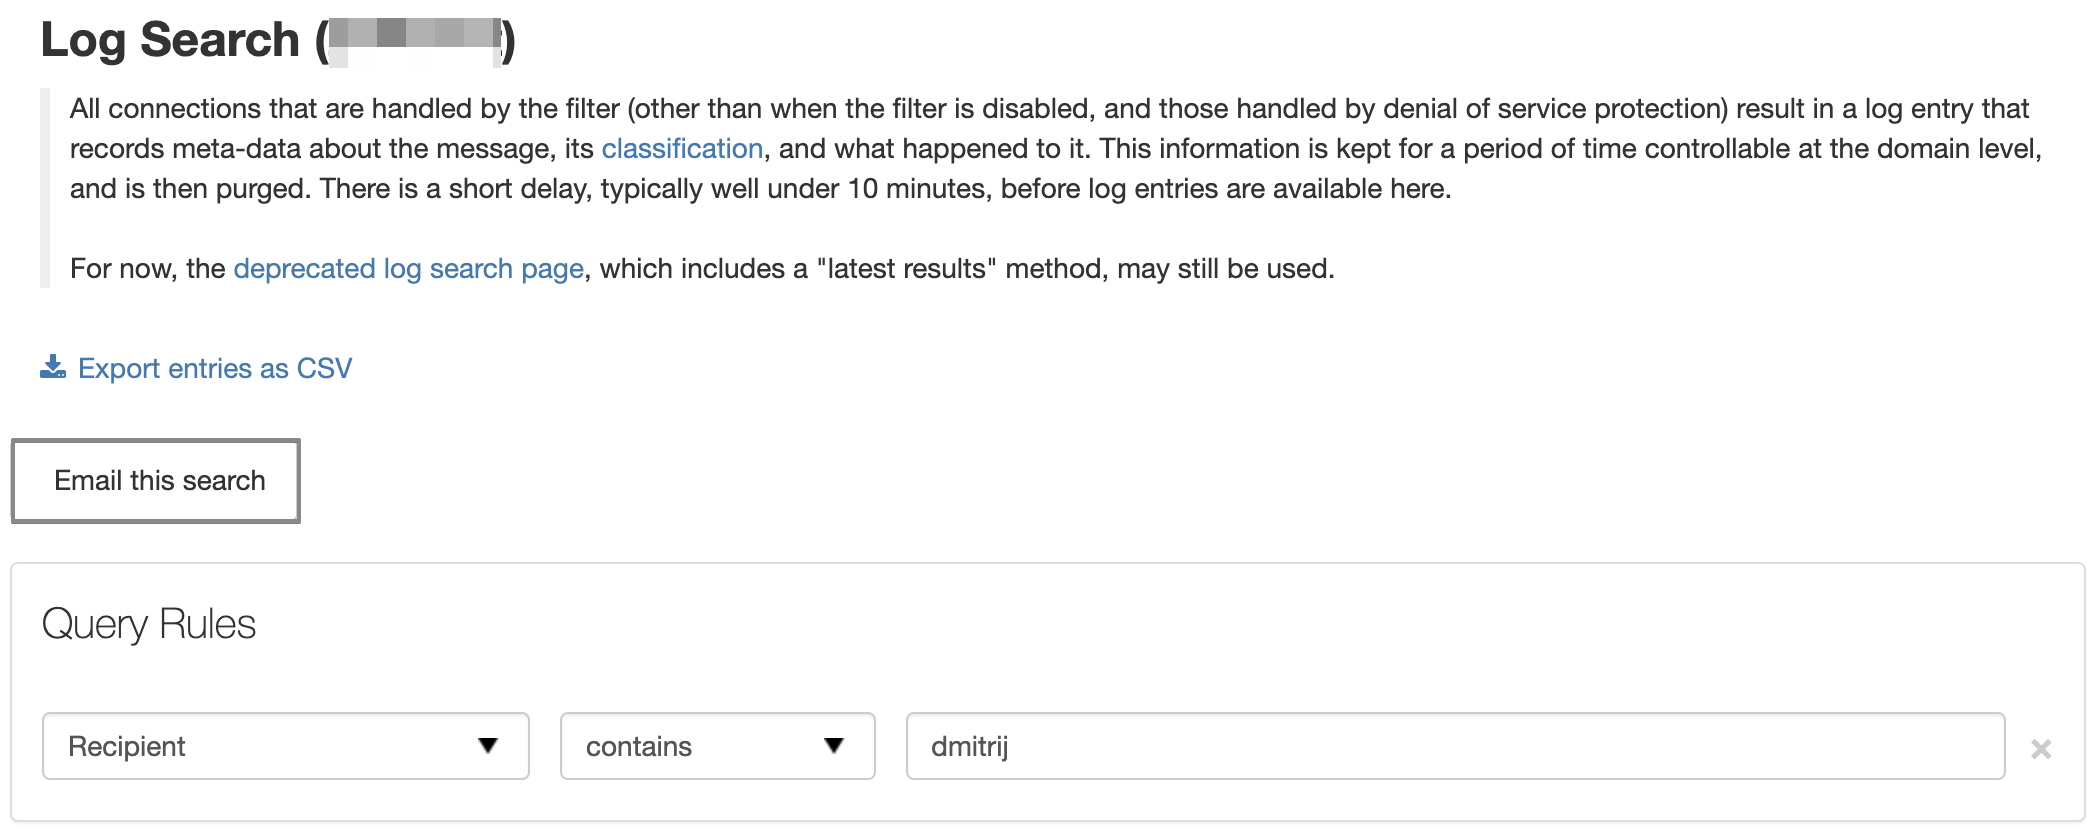
In the opened window fill these details:
Subject – you can specify the needed subject of the message;
Delivery – select when the email with logs will be sent;
Sender – the sender which will be indicated upon receipt of the letter;
Recipient – email address where email should be sent;
Template name – the layout of statements:
- row – each log is sent separately;
- columns – logs are sent in one table.
After all, sections are filled, select the “Schedule” so that an email to be sent.