
In this article, Hamster will provide a tutorial step by step on how to manage additional disk partitions and their sizes. ‘Disk Management’ is a built-in tool on Windows Server OS, so it is not required to install any additional tool. Creating partitions and adjusting their sizes never be so easy as now. Let’s take a look.
Requirements
Windows VPS with already installed OS (Windows Server 2012, 2016, 2019)
Connection to the VPS
Connect to your VPS via Remote Desktop (from Windows desktop) or rdesktop (from Linux).
Opening Disk Management Application
There are few ways to access this application.
Via Server Manager
- Since right after connection ‘Server Manager’ will show up immediately, you can start by selecting ‘Tools’ tab and ‘Computer Management.’
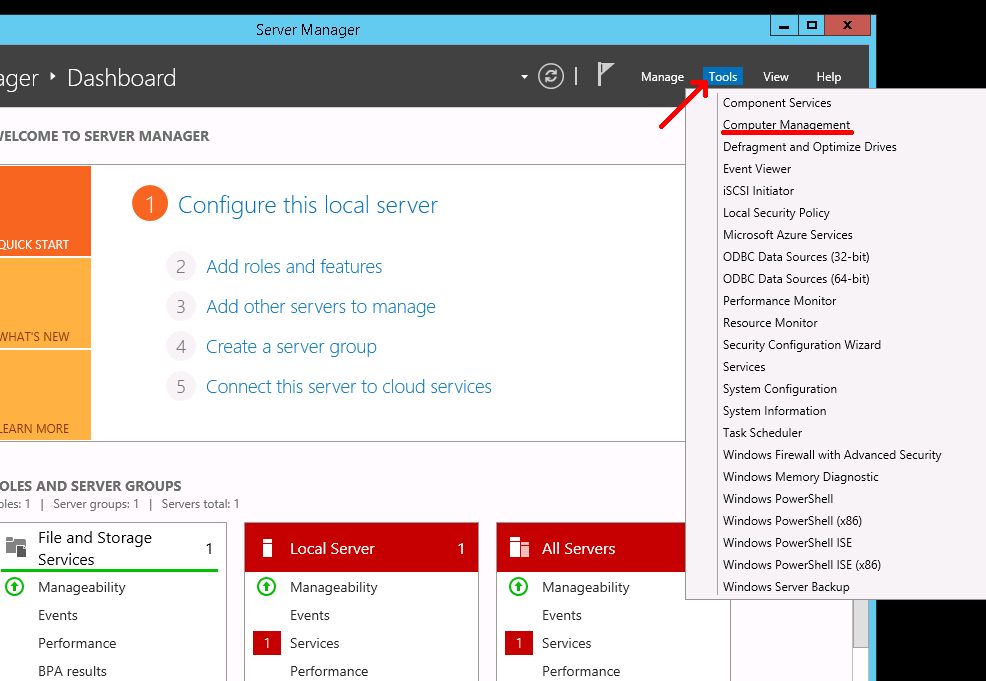 2. Choose the ‘Disk Management’ option on the left menu under ‘Storage.’

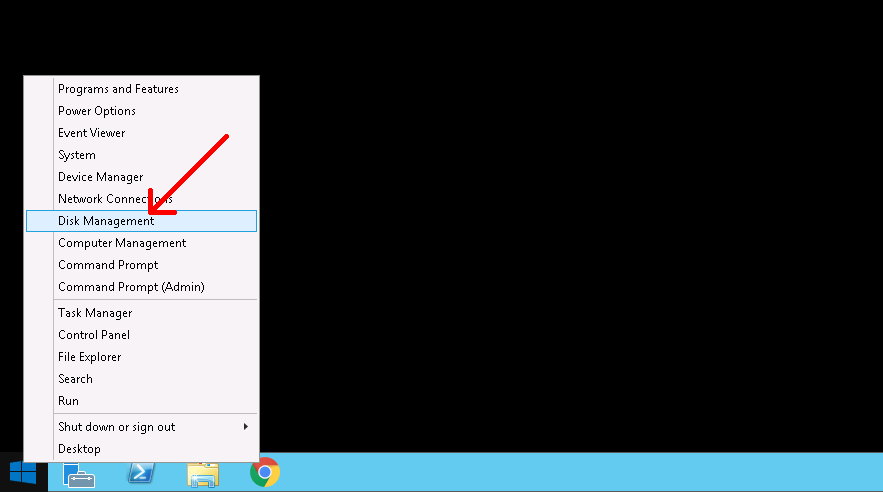
 Via Start Button
Select the ‘Start’ button and choose ‘Disk Management’

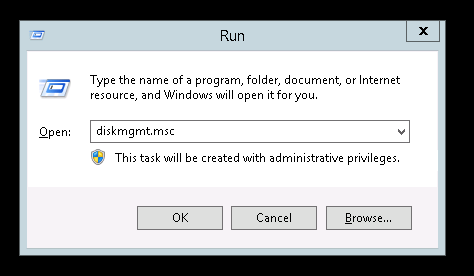
 Via Command Line
The third option is to summon ‘Command Prompt’ and run ‘diskmgmt.msc’ command
Using Disk Management utility
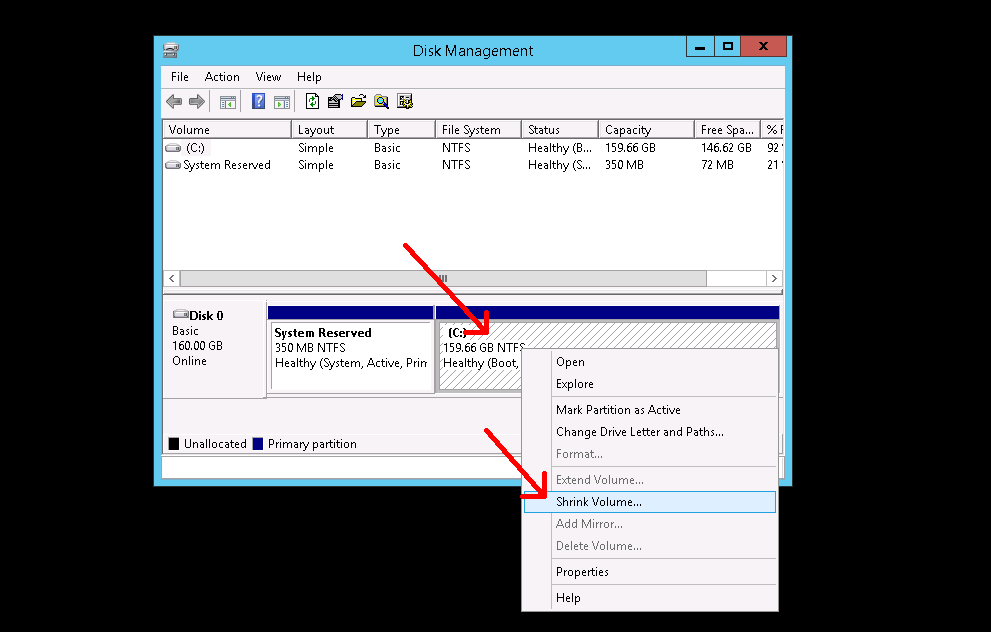
1. By default, after purchasing Windows VPS, all disk space is assigned to the C: Volume. So, to create the additional partition, first of all, you need to shrink the current Volume to allocate a disk space that you need. Click the right button on the C: Volume and select ‘Shrink Volume’ option.
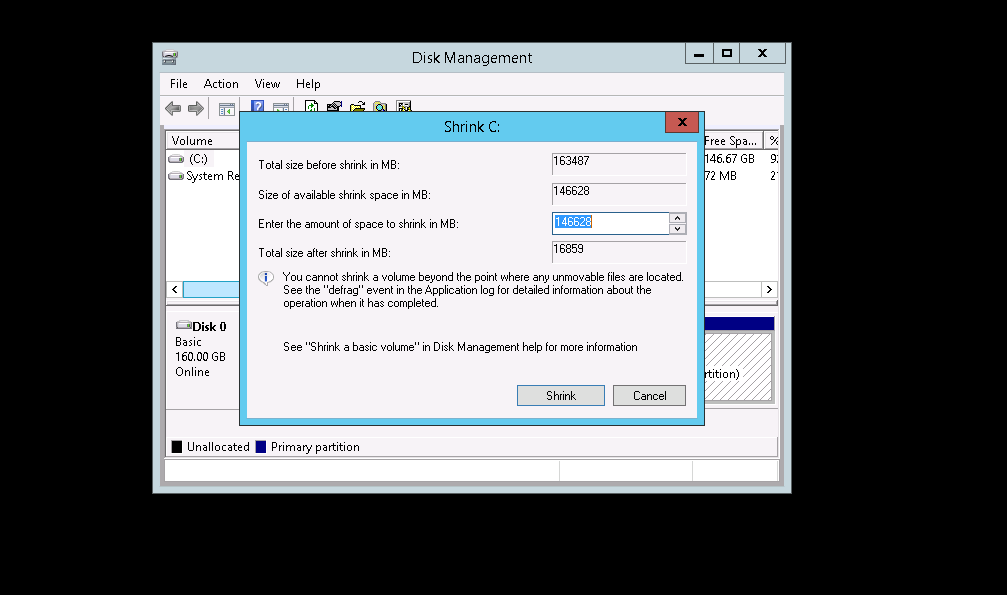
 2. A new table will prompt, and you need to choose, how many MB of the free (available) disk space you choose to shrink from your current Volume and press ‘Shrink’ button.
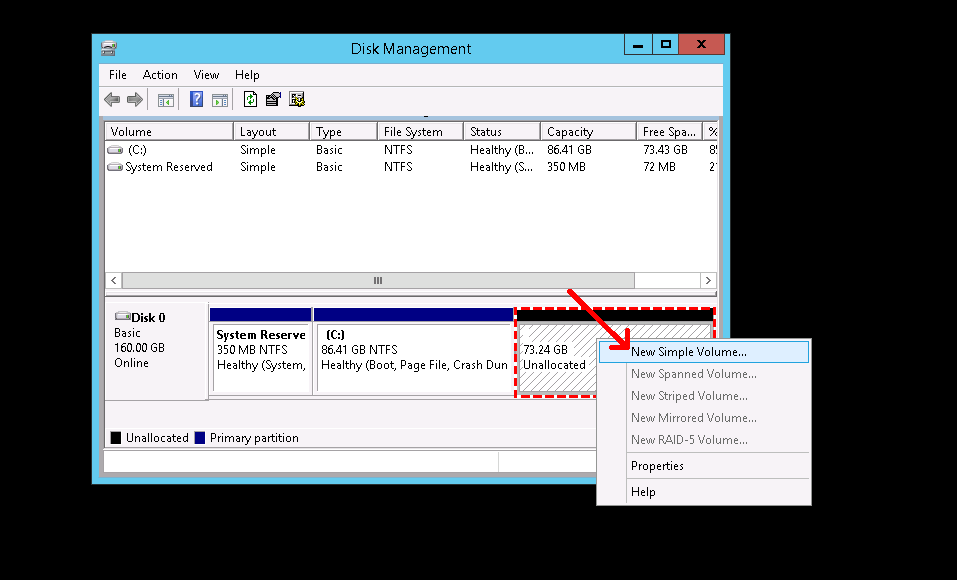
 3. After the completion of the process, application will show you unassigned partition space. You can use it for a new Volume by right-clicking the ‘Unallocated’ disk space field and choosing ‘New Simple Volume…’ option
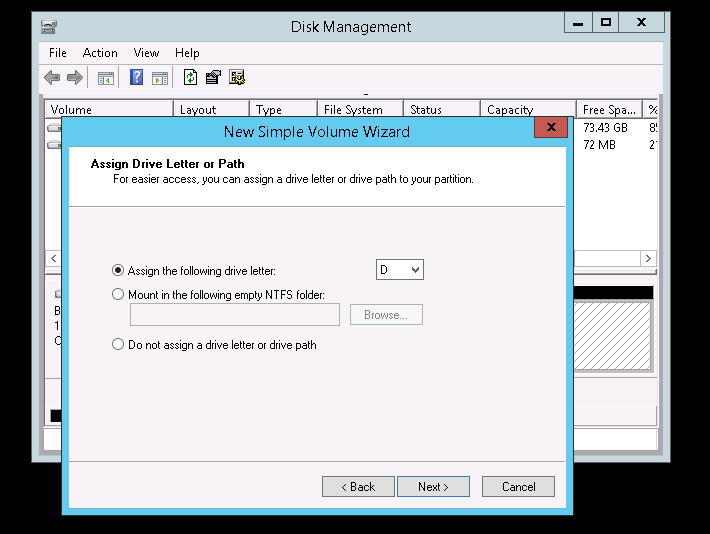
 4. A set-up page will appear, and here you can provide a disk space size of available free disk space for the new partition. Assign the desired character for your new Volume. By default, the next one from C: Volume is D: one.
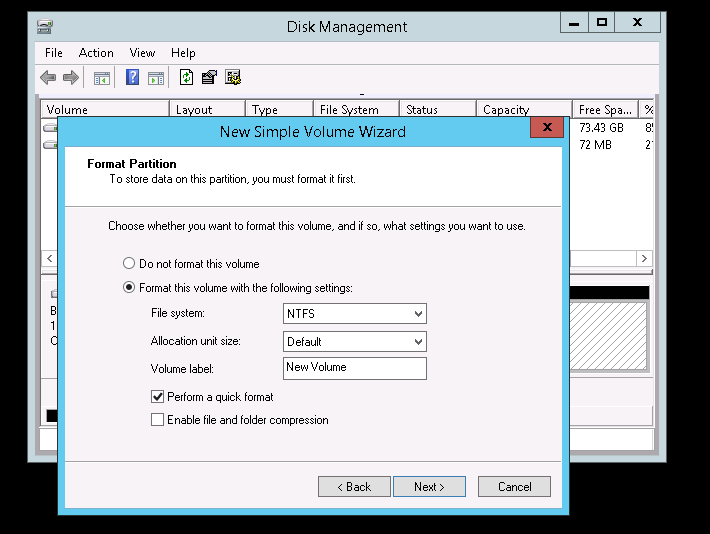 5. Save all settings by pressing a button ‘Next.’ After all, A new Volume will appear in your ‘Disk Management’ application and you can see it in ‘My Computer’ window.
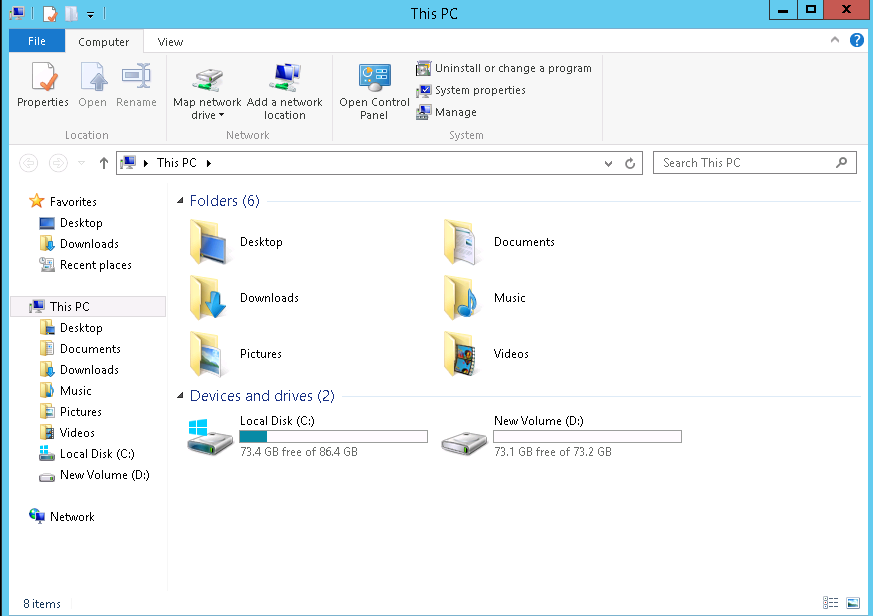 That’s it! You have created additional Volume to separate your files inside of VPS. ‘Disk Management’ utility allows you to delete (only for additional Volumes), shrink and extend created Volumes.
For more information please visit this link.